

Polishing Discs |
| How to operate
1. Remove excess composite and contour the restoration using a fine diamond or carbide bur. |
| Warning
1. Do not use discs and mandrels on handpieces intended for speeds exceeding 30000 rpm to avoid the disc or mandrel damage that may lead to an injury. |
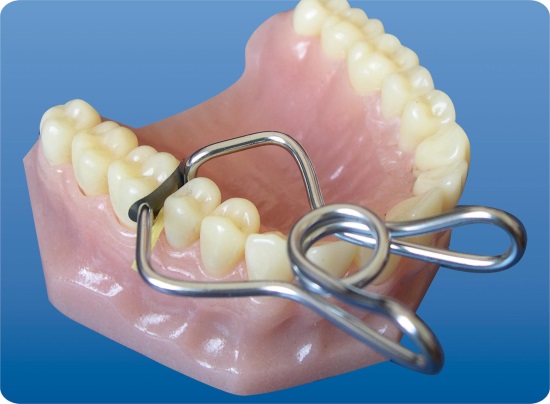
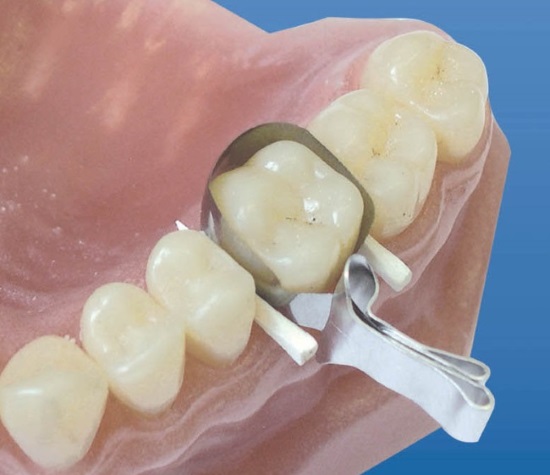
Metal Sectional Matrices |

|
Install matrix and fixing wedge |
|
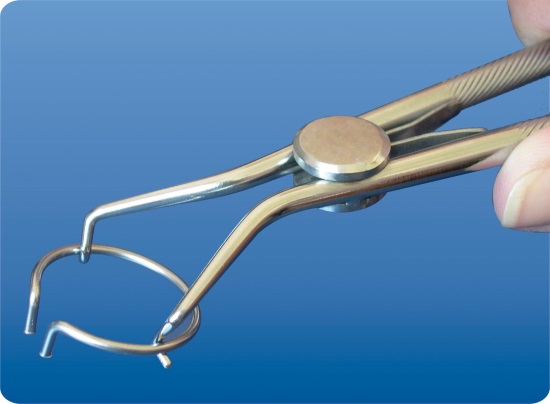
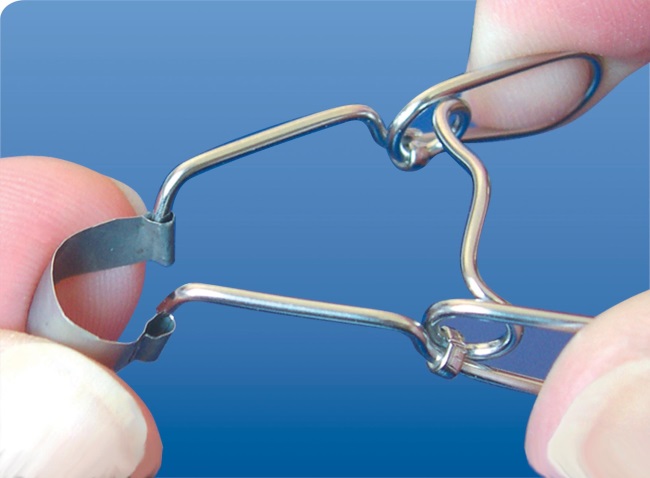
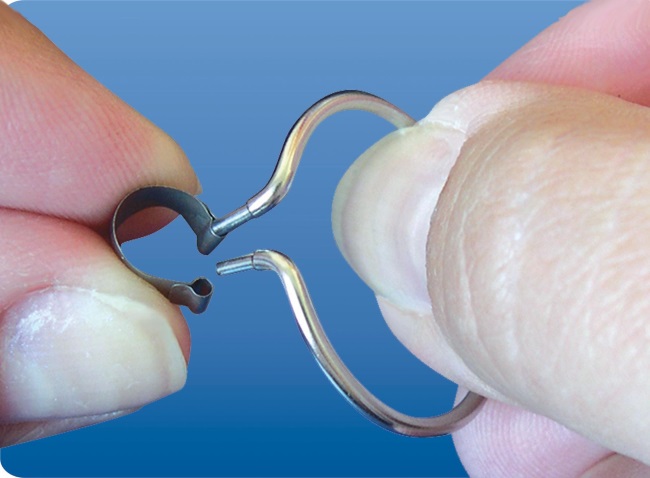
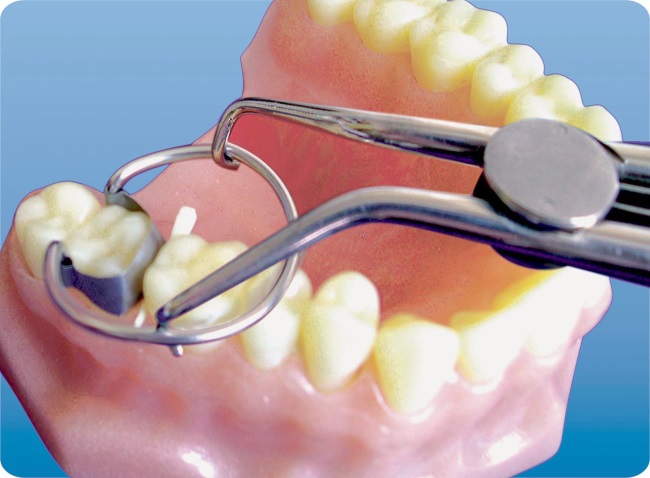
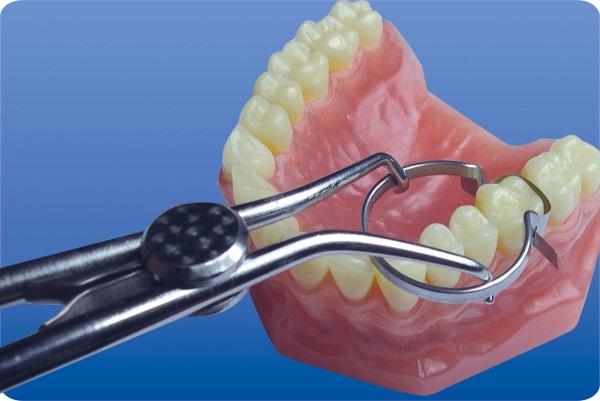
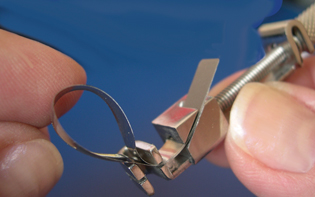
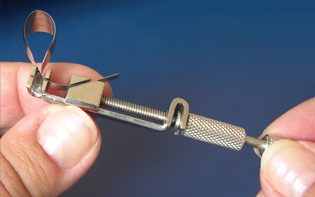
Using forceps N 1.099-1 (or NN 1.099-2, 1.099-3) force apart the ring N 1.099, avoiding excessive opening of ring tines. |
|
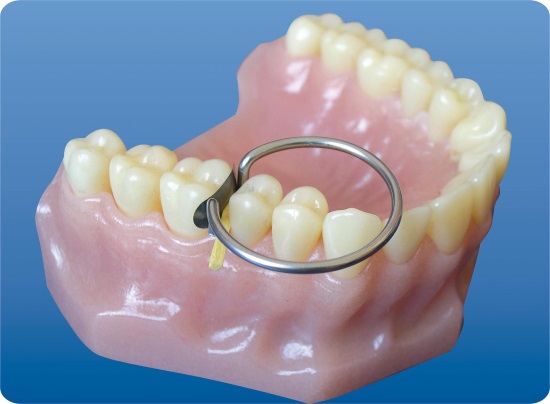
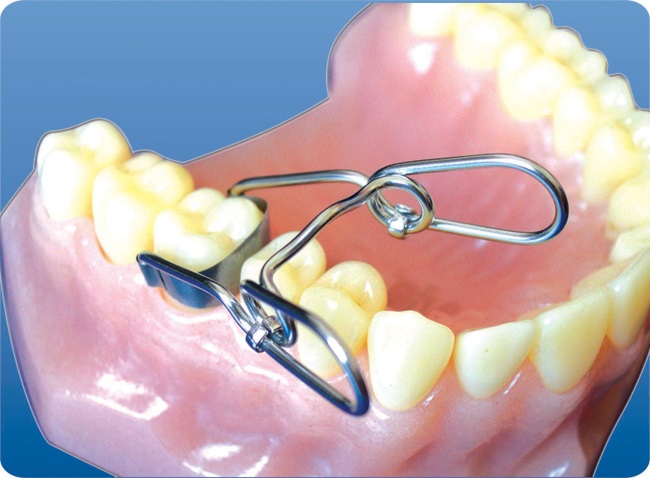
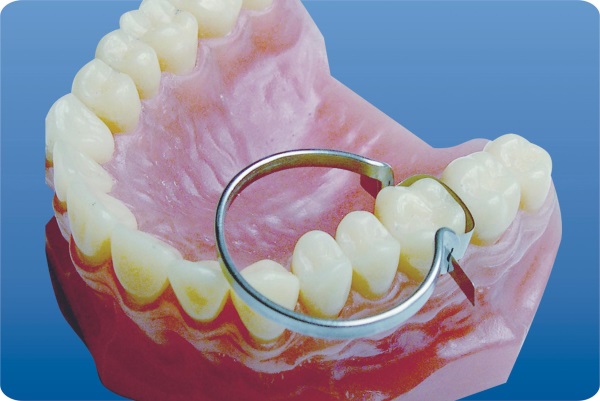
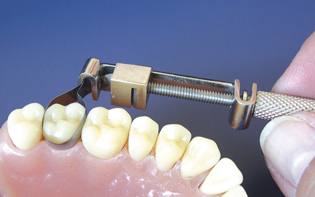
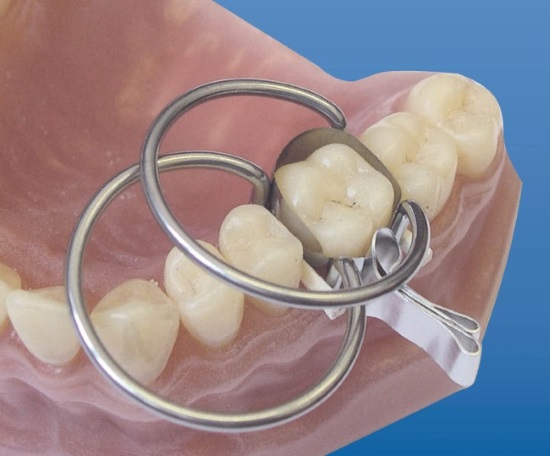
Install the ring onto the matrix and perform restoration. |
Variants of installation with rings N 1.099 |
|
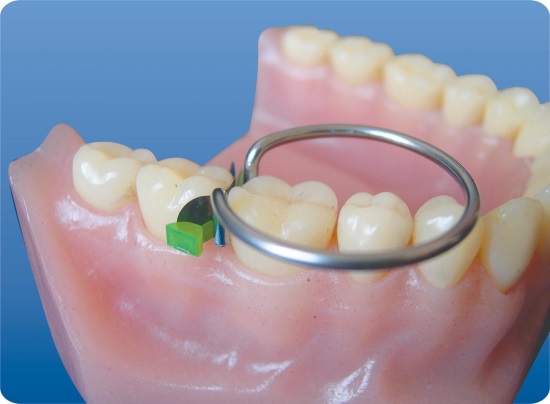
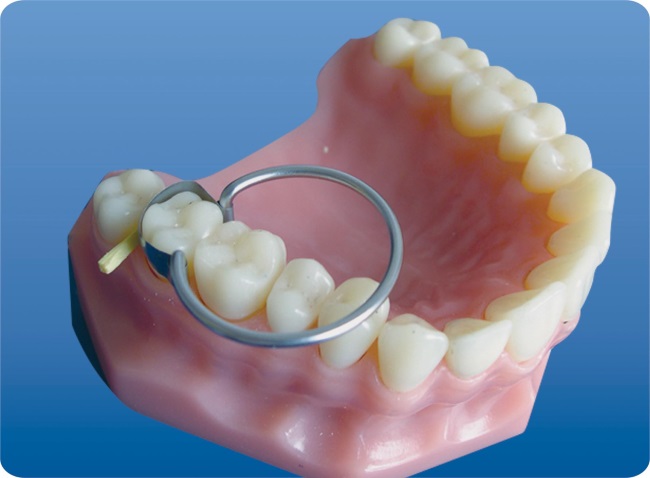
Ring after wedge - restoration of large decays. |

|
Ring before wedge - restoration of small decays. |
|
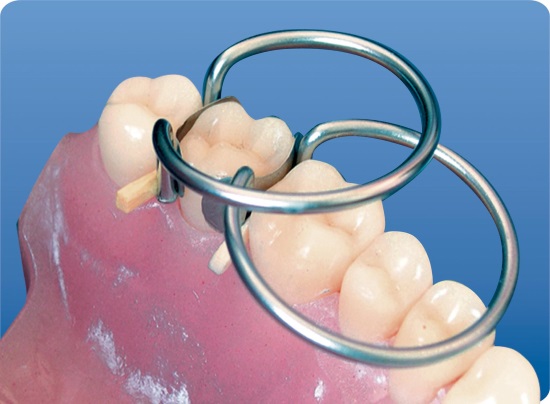
Installation of two rings with different lengths of tines on two contact points of the tooth. |
|
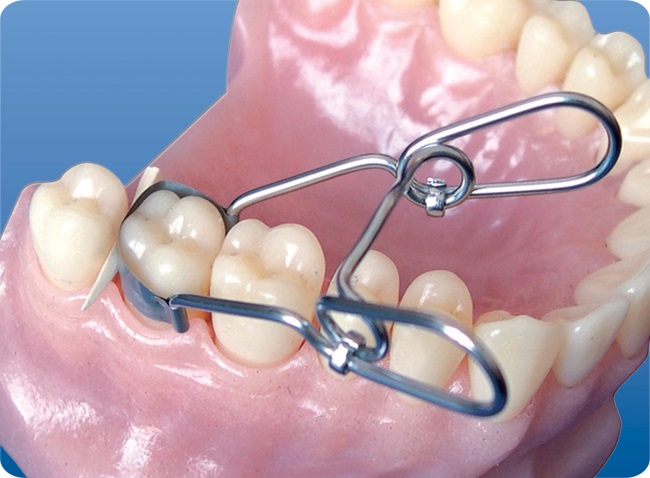
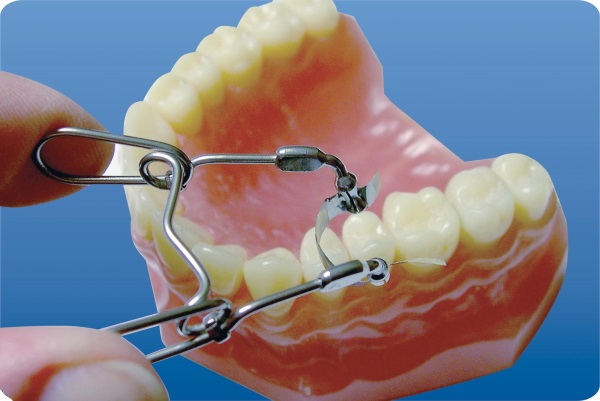
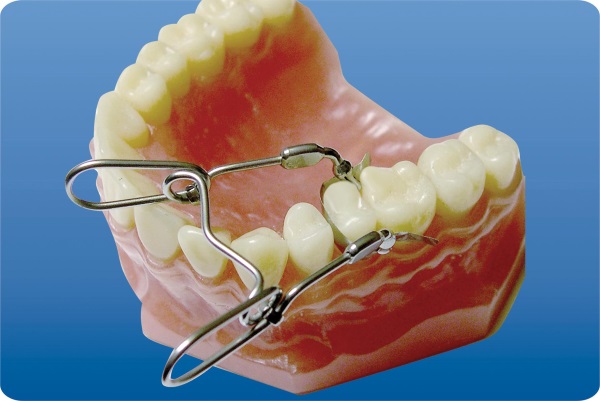
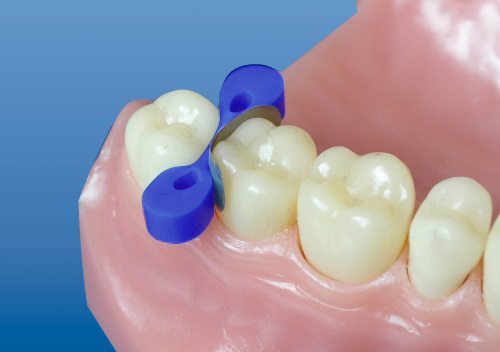
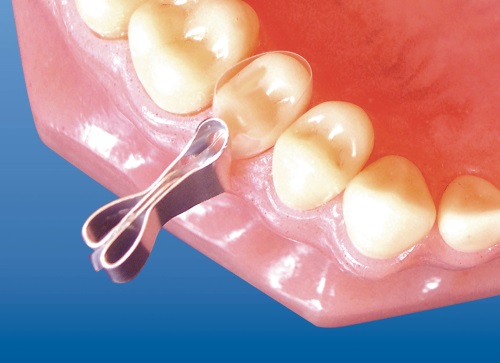
Install matrix, wedge and springclip. |
| Springclip N 1.009 combines functions of ring N 1.099 and forceps NN 1.099-1, 1.099-2, 1.099-3). Springclip presses matrix to the tooth easier than ring installed with forceps. |
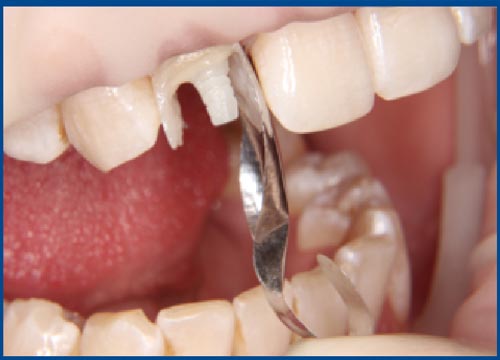
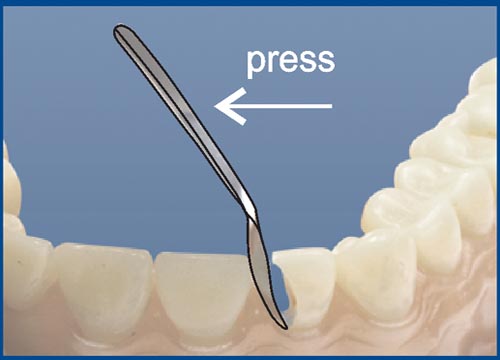
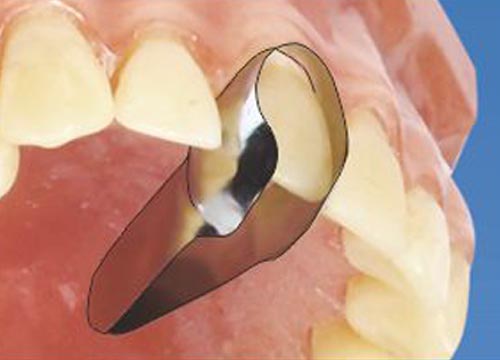
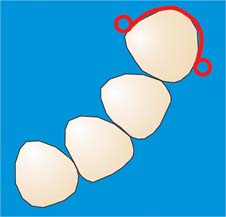
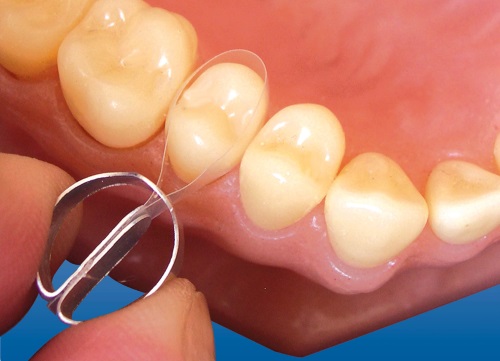
Anterior Strips and Matrices |
|
How to operate |
|
1. Install anterior strip vertically. |
|
2. Press the handhold of the strip forcing its working part to the adjacent tooth. |

|
|
Saddle Metal Matrices |
| To provide perfect contact choose appropriate matrix length. | ||

|

|
|
| incorrect | correct | incorrect |
| Please keep in mind that tines of ring and springclip for sectional matrices are larger than diameter of cylinder-shape tubes of saddle matrices, so ring № 1.099 and springclip № 1.009 are not appropiate for installation of saddle matrices. | |
 |
 |
| Tines of ring № 1.033 |
Tines of ring № 1.099 |
Installation with springclip № 1.003 |
|
Choose matrix of appropriate length and insert tines of springclip outside the patient mouth into the matrix side tubes. |
|
Install system onto the tooth. |
|
Operating position on mesial side. |
Installation with ring № 1.033 |
|
Choose matrix of appropriate length. Insert ring tines into the saddle matrix side tubes (you may force apart the ring tines usinf forceps to make insertion more convenient). |

|
Install the system on to the tooth using forceps № 1.099-1. |
|
Operating position. |
|
Operating position on mesial side. |
Metal Contoured Matrices Pony |
Installation with Slot sprinclip № 1.004 |

|
Insert matrix into the slots of springclip. |
|
Regulate the matrix loop length, fix it and install the system onto the tooth. |
|
Operating position. Installation on distal surface is also possible. |
Installation with Slot ring № 1.044 |

|
Open the ring with matrix via forceps №1.099-1 or via standard rubber dam clamp forceps and insert matrix into the slots of ring № 1.044. |
|
Open ring with matrix using forceps and install the system onto the tooth. |
|
Operating position. System can be also installed on mesial surface. |
| When fixing matrices different from Pony matrices, please, be sure that the width of matrix wings is less than slot height, cut the wings to fit slot height if necessary. |
Metal Contoured matrices |
OPERATING WITH TOFFLMIRE MATRIX RETAINER(transparent contoured matrices are installed in the same manner) |
|
1. Turn of screw 1 to set free slot 3 and insert matrix |

|
а) in slots 4 and 3 (matrix loop along matrix holder axis), |

|
б) in slots 5 and 3 (matrix loop perpendicular to matrix retainer axis). |
|
2. Fix matrix in matrix retainer by turning of screw 1. |
|
3. Fix matrix on tooth by turning of screw 2. |
Metal Contoured Matrices with Clamp |
How to operate |

|
1. Install matrix onto the tooth and press the clamp. |
|
2. Operating position. |
|
Restoration of two contacts with matrix combined with clamp, fixing wedges and ring № 1.099. |
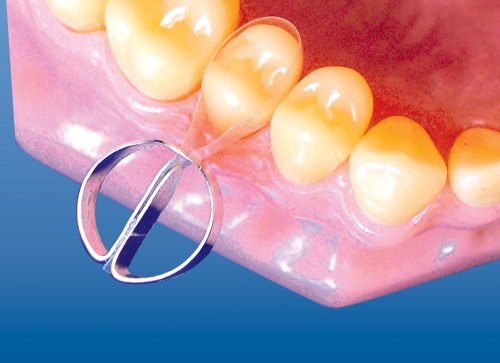
LOOP MATRICES |
How to operate |
|
Construction of loop matrices provides simplicity of loop length regulation in accordance to tooth size. Loop matrices are installed without retainer. Mainly to be used for protection of adjacent tooth against bur upon cavity preparation. . |

|
1. Regulate the loop size corresponding to the tooth size. |

|
2. Install loop marix onto the tooth and tighten matrix end up to complete embracing of the tooth. |
Wedges Elastic |
How to operate |

|
1. Outside the patient mouth install forceps tines into the holes of elastic wedge. |

|
2. Open forceps stretching elastic wedge and install it into interdental space. |
|
3. Operating position |
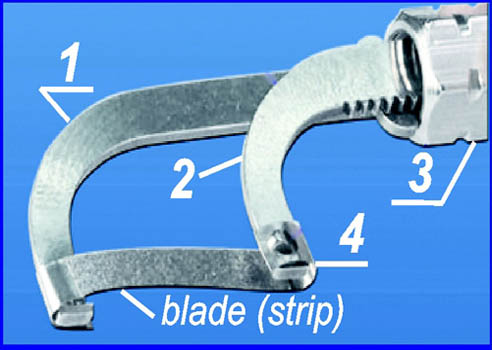
Do-All Proxicut System |
How to operate |
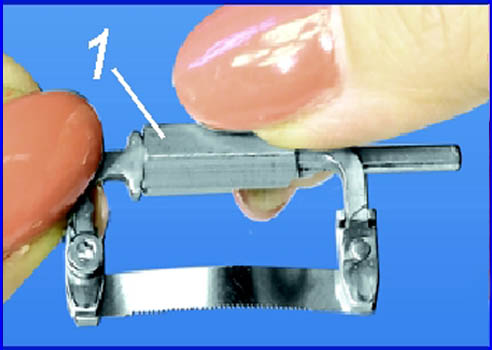
|
Rotate screw handle 1 to move closer legs of do-all proxicut holder so that the distance between outer sides of holder legs becomes equal to the length of the blade (trip). |
|
Insert the blade (strip) in gripes 2 of holder legs and tighten the gripes with key 3. |

|
Rotate screw handle 1 to tighten the blade (strip) between holder legs. |
|
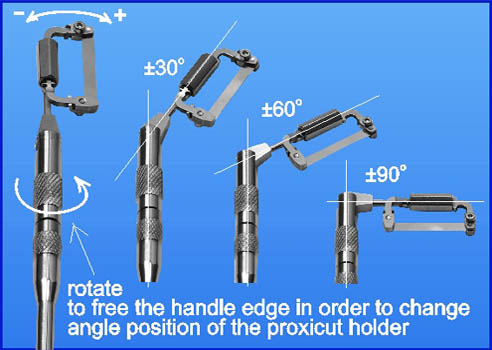
Modes of holder - handle fixation: with handle № 1.107 |

|
with handle 1.109 Do-all proxicut holder can also be operated without handle or fixed in EVE-type hand piece providing to-and-fro motion. |
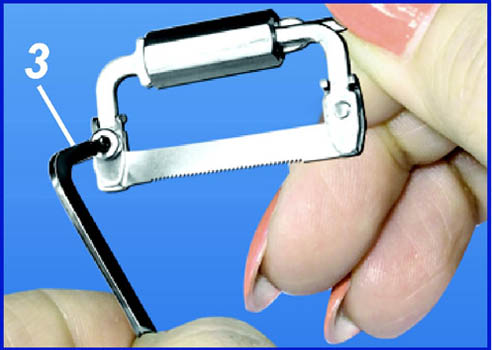
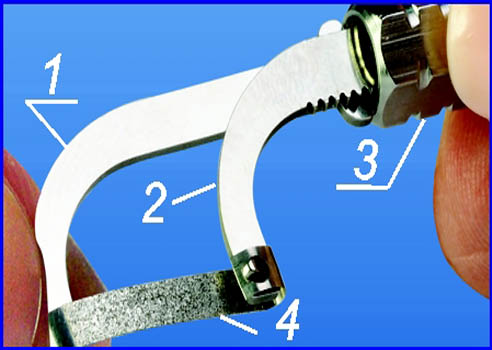
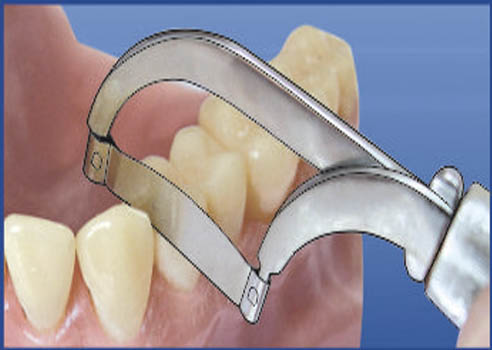
Proxicut System |
How to operate |
|
Insert finger of leg 1 of the proxicut holder into the hole of saw blade (diamond strip) 4 and bend the blade (strip) 4 around leg 1 of the proxicut holder. |
|
Bend the blade (strip) 4 around leg 1 of the proxicut holder, insert finger on leg 2 of the proxicut holder in another hole of the the blade (strip) 4. |
|
Rotate screw handle 3 of the holder to tighten up the blade (strip) between legs 1 and 2 of the holder. |
|
Remove excess filling material by rocking motion of the blade (strip) 4 within inter-proximal space. |
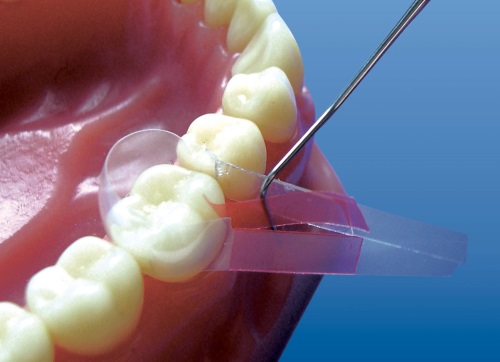
Transparent Contoured Matrices with Clamp |
Installation |
|
1. Install matrix onto the tooth. |
|
2. Fix matrix on the tooth by pressing the clamp. |
|
3. operating position. |
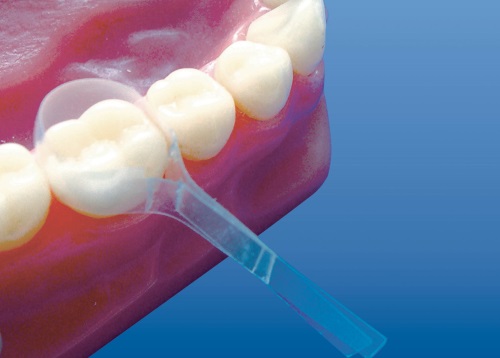
Transparent Contoured Self-Adhesive Matrices |
Installation |

|
Install matrix onto the tooth. |
|
Remove red protective layer from matrix sides. |
|
Stick glued matrix sides with each other. |
Transparent Cervical Matrix System |
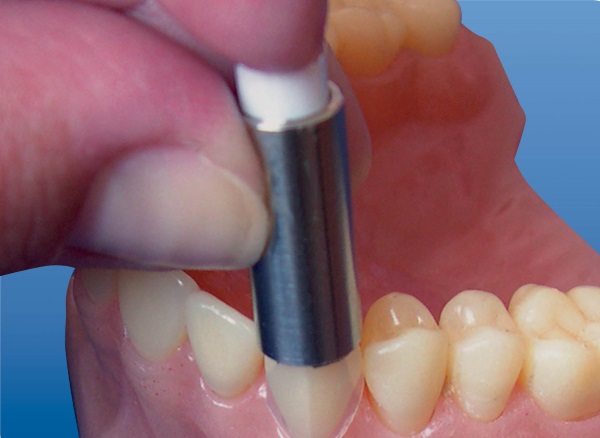
How to operate: |
|
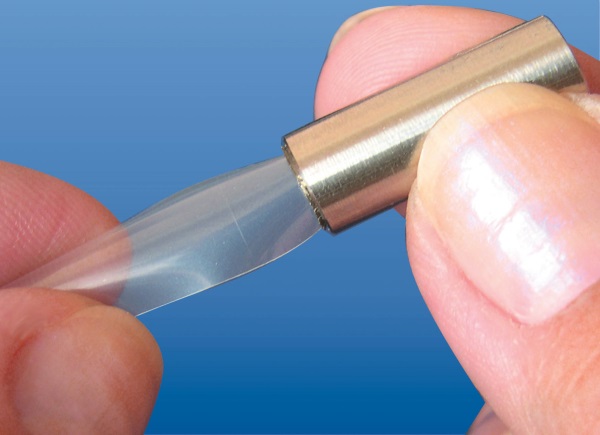
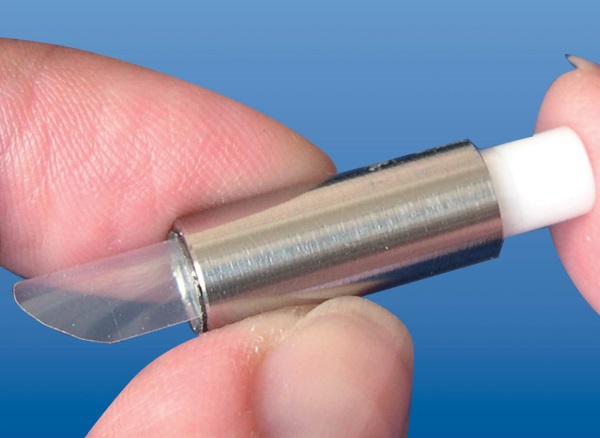
1. Insert matrix into the cervical former. |
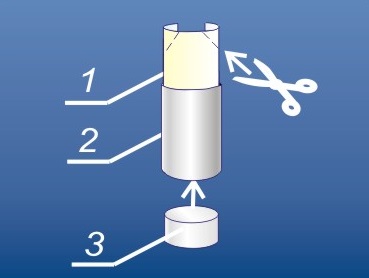
|
2. Cut out matrix in accordance with the tooth shape. Regulate the matrix position according to the tooth size. |
|
3. Fix matrix in the cervical former by the stopper. |
|
4. Perform the tooth restoration. |
Transparent Crowns |
How to operate: |
|
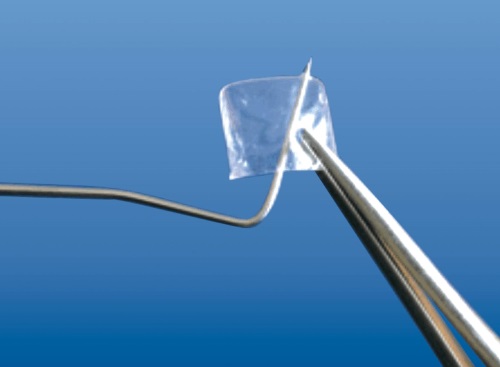
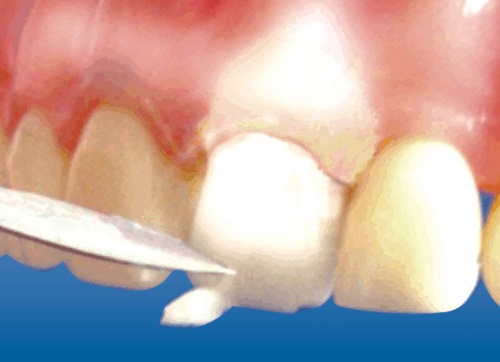
1. Cut off the crown from the plate (if necessary) and puncture it. |
|
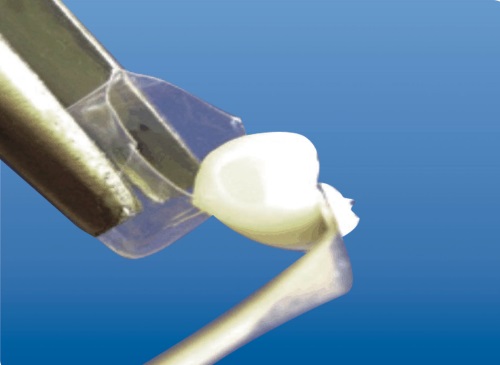
2. Place the crown with filling material. |

|
3. Put the filled crown on to the tooth under restoration. |
|
4. Remove the excess filling material squeezed from the hole. |
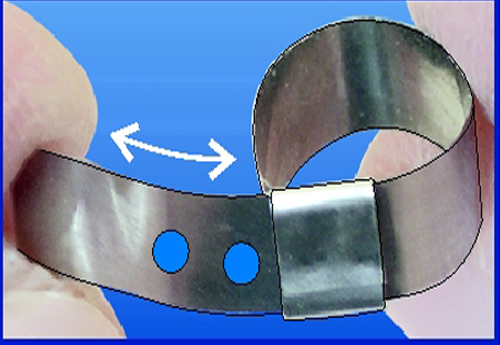
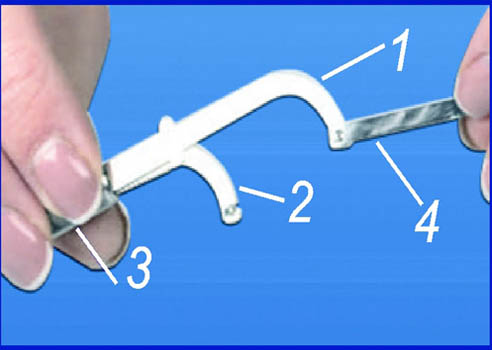
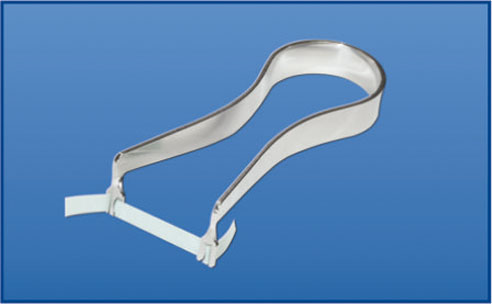
Strip Holders |
How to operate |
|
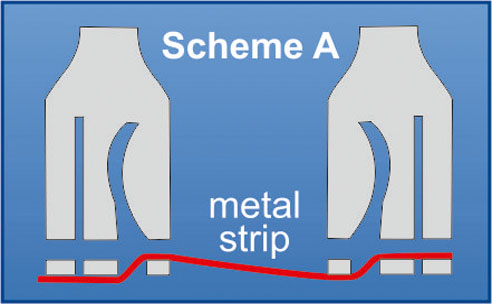
Metal strip fixation in holders №№ 1.105, 1.106, 1.106B. Scheme A |
|
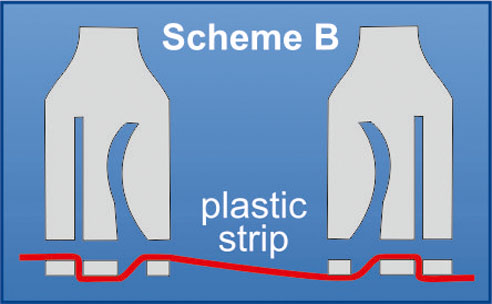
Plastic strip fixation in holders №№ 1.105, 1.106, 1.106B. Scheme B |
| |
|
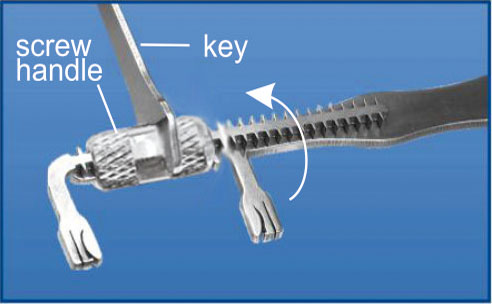
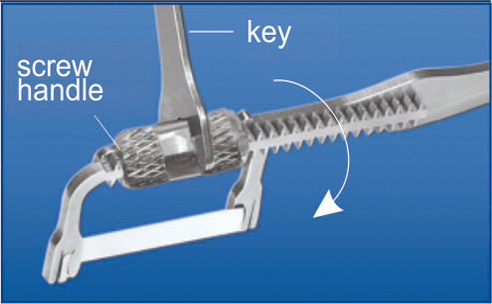
Choose appropriate distance between holder tines by rotating holder screw handle with key,
insert the strip into the slots of holder tines: metal strips - scheme A (see above) plastic strips - scheme B (see above). |
|
Tighten the strip by rotating holder screw handle with key. |
| |
|
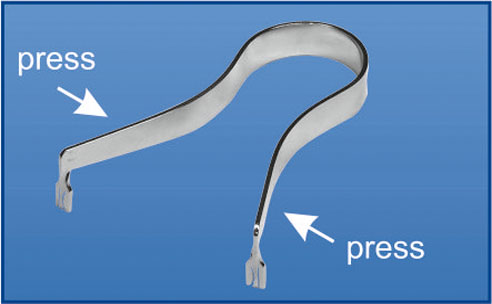
Press tines closer as shown in the figure, insert the strip into the slots of holder tines: metal strips - scheme A (see above) plastic strips - scheme B (see above). |
|
System is ready for use. |